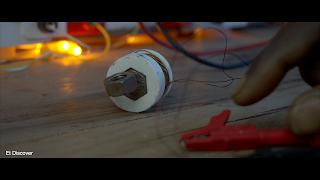
this object is floating in the air, that's what looks amazing but how to work it? this is a Hall Effect sensor, why do we need this Hall Effect sensor? how do work it actually?
Links to Purchase Everything in this Project
LM358 IC Buy it
A 3141 Hall sensor Buy it
Neodymium Magnets Buy it
5mm Led. Buy it
Resistors. Buy it
Male +Female DC Socket Buy it
Capacitor kit. Buy it
Copper Wire. Buy it
here is a small circuit for this hall effect sensor, see here the main interesting part,
When I bring this magnet to this sensor this LED makes off.
South means zero, and North means one. this way this sensor worked.
and exactly these sensors I was looking for.
now you might be thinking I don't understand anything about how the floating process actually works
so that reason I have to make an electromagnet,
Here I am using 27 w a g copper wire which you need to twist 300 times to this 3D printed shell.
STL files Download
Now if I select my power supply of 8 volts and connect it to this copper coil I can see that this copper coil becomes an artificial magnet,
This means that controlling the magnet is completely in my hand grip
Now try to understand very well, if I bring this neodymium magnet near this electromagnet it gets attached immediately by its attraction.
If I reverse the current flow I can see the magnet tip reacting in reverse
But I need the first process here.
My plan is that when this neodymium magnet is about to fall down,
Just then my electromagnet will be active and will pull it again,
Whenever pulled, the position of the neodymium magnet will change, resulting in the electromagnet becoming inactive again.
And this process goes on and on and on and on, and as a result, we can see a floating scene
This will be possible only for Hall effect sensors
But who will control all this? And how will it be controlled? ok no problem
For that I have made a rough diagram here, let's try to understand it
This is the hall effect sensor and it gives the binary value 1 and 0 as I told you earlier,
I have pulled up the output pin of this sensor with a 10k resistor and connected a capacitor to the ground so that I can store the value for a certain period of time.
I used an opamp to compare the value of the sensor.
I added a voltage divider to the noninverting input so that I get a fixed voltage.
and compare the sensor voltage with that volt.
whenever it is equal value then our output will be high.
The output voltage of this opamp is not enough to activate a MOSFET properly, so I made a pushful circuit with an NPN and PNP transistor.
The function of these two registers is to pull up and pull down those transistors.
Now those transistors' voltage is amplitude enough to activate this MOSFET,
this time this mosfet can give a high current to our electromagnet.
And this is a flyback diode, whose function is to prevent the electromagnet's spy current from destroying everything
Hope you understand everything correctly, now I will gather all the parts and try to make them into a copper dot board.
I have used SMD Mosfet here but you can also use dip Mosfet if you want.
Anyway, so far I need to make a structure to see if everything is working properly according to my plan,
into which I can fit everything properly so let's build it.
I will take a wooden frame to fit everything properly.
next will use my drill to attach the PCB board with screws,
For the rest of the framing, I had already cut the outer part from the 3D Flamet shell.
This is my main structure
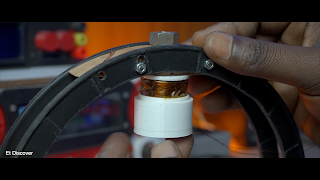
Here is another piece of wood, I will use to properly hang the electromagnet.
I believe the electro-magnet is in the correct parallel
Now I will connect the electro-magnet wire to this board, you may need to sweep the wire after testing.
next, I'll stick the Hall Effect sensor into a 3D-printed shell so the sensor can work properly.
Then the wires of this sensor should be connected to this board.
Now I will attach the 3D-printed shell to the face of the electromagnet so that it can sense properly.
The power cable will connect to this device.
Now bring the neodymium magnet in front of the sensor
Hey, the magnet is floating in the air
see it works pretty well as I had planned.
After realizing everything is working properly so far, I'll attach 2 LED sticks here to make things look nicer.
Then I did a little more modification and decoration to make the thing different.
hope you understand.
It looks quite beautiful.
You can build it if you want
This might be a great project for your school,
Schematic


please do not enter any spam link in comment box